What is the best channel for my wireless router?

wifi logo

The best channel for your wireless router is the one that has the least amount of interference on it.

Strictly speaking, all channels are the same. Lower channels don’t have more bandwidth than higher channels or vise-versa.

In other words, if you were all alone on a desert island and it was just you, your laptop, and router, you would have the exact same experience on every channel.

This is because you would be the only device on your Wi-Fi network, and there would be no nearby Wi-Fi networks or other sources of interference.

Unfortunately, we don’t all live on islands by ourselves – free of frequency interference and bathed in high speed internet.

 How Wi-Fi works


tv remote channelWi-Fi is a shared communication medium. This means that all nearby wireless devices (yours, your kids or roommates, and even your neighbors) are competing for use of the same airspace.

Now within that airspace, there are multiple channels available for use – like channels on your television, each with something different going on.

Now think of the activity going on in a channel as a phone conversation. All nearby wireless devices that are on your channel (or an adjacent overlapping channel – more on this in a moment) are like a group of people that are all on a conference call. Only one person can speak at a time.

If there are only two or three people on the call, everyone can say what they need to say without much of a wait. But on a call with 50 participants for example, people are going to have to wait a long time to speak.

Wireless communication works the same way. The more devices, nearby networks, and interference there is, the slower and less reliable your Wi-Fi network will be.

Yes, the channel you pick matters, but only sometimes

Manually picking a wireless channel is becoming a thing of the past on 5GHz networks, but it still matters on your 2.4GHz network.

2.4GHz

If you are using a 2.4GHz radio, which most likely you are, (most older routers run exclusively at 2.4GHz and newer routers have dual-band 2.4GHz AND 5GHz radios) then you should be using one of the three non-overlapping channels.

This would be channel 1, 6, or 11

The reasoning for choosing 1/6/11 is complex, but suffice to say that all of the 2.4GHz channels overlap with each other to some degree.

What does overlapping mean? It means that devices in nearby channels will interfere with each other, even though they aren’t in the same channel. Kinda defeats the purpose of having channels, doesn’t it? Don’t get me started.

So why choose 1, 6, or 11? Because it is the most efficient strategy.

If you need 3 wireless routers or access points in the same room, putting one on channel 1, one on channel 6, and one on channel 11 is the best strategy. No other choice would allow all three devices to operate without interfering with each other.

Sure, there are other non-overlapping choices you could make – channel 2 and 10 don’t overlap, for example. But 1/6/11 is the only choice that will give you three independent channels.


2.4ghz wifi channels


OK I’m using a recommended channel, now what?

Using channel one, six, or eleven makes it a little easier to avoid adjacent-channel interference – but only if the other wireless networks near you are using the same strategy. The problem comes in when someone nearby is using one of the other channels (2-5 or 7-10).

For example, if you were being good and chose channel 1 or 6, but your neighbor next door is using channel 3 or 4, your neighbor’s network is still going to interfere with yours. You could try changing your router to use a different channel, but it may be difficult to find one that doesn’t interfere with someone else, especially in multifamily housing or apartments.

If everyone would only use 1, 6, or 11, the world would be a better place – but unfortunately this is not the case. Still, you can do your part by picking one of these non-overlapping channels.

5GHz

5GHz Wi-Fi is the future and you should be using it now if your router AND your devices support it. I say ‘AND’ because many devices still only support 2.4GHz networks.

For example, just thinking of a few devices in my house, my Chromecast, Sony smart TV, robotic vacuum (Roomba clone), and my laptop all lack 5GHz radios. Yep, they only operate at 2.4GHz. This means that I must leave my 2.4GHz radio enabled on my router, or I will not have connectivity with these devices.

radio channel frequency

Why is 5GHz better?

The 5GHz spectrum is wider and supports more channels. In the US, there are 25 channels in the 5GHz spectrum, and all of them are non-overlapping.

In addition to the higher availability of non-overlapping channels, 5GHz radios also support higher throughput (albeit at slightly shorter range due to the higher frequency) and technologies like multiuser-MIMO, which acts as a sort of channel bonding.


Disclaimer: This article applies to users in the United States. If you live in a different country, check with your national communications regulatory/authority, as the laws regarding the frequencies you can use will likely be at least a little bit different.

Best WiFi Booster for RV

rv plus antenna


Camping in an RV is a great way to relax, vacation, and see the countryside. Let’s be honest though – most of us want to stay connected to the outside world, even while we are camping.

After all, people buy or rent RV’s because they want to enjoy some of the comforts of home while they camp. Those that aren’t interested in having creature comforts usually opt for backpacking and tent camping instead.

While many RV parks, campgrounds, and marinas offer Wi-Fi to their customers, accessing this service from your RV can sometimes be a challenge. Many times, the Wi-Fi facilities may be sub-par – perhaps the campground only uses a single wireless router and doesn’t have any outdoor access points deployed.

Maybe your campsite is just too far from the office or clubhouse. Or, perhaps the campground didn’t intend for Wi-Fi to be accessed from the campsites and their only goal was to cover the general areas around the clubhouse, pool, picnic areas, etc.

Wouldn’t it be nice to be able to utilize campground Wi-fi reliably from the comfort of your RV? We think so to. Interested? Read on.

Alternative means of accessing the Internet

There are, of course, other alternatives to relying on campground Wi-Fi – with the main one being mobile 3G/4G cellular data. This, however, is not always reliable, and can also be quite expensive – since you can quickly burn through your mobile data allocation.

Satellite Internet is another possibility, however it can also be slow and expensive, and usually requires an annual contract.

Fixed Wireless through a Wireless Internet Service Provider (WISP) is a good option, except for the fact that most RV’ers are moving between campgrounds regularly and thus setting up a permanent fixed wireless solution isn’t really an option. If you tend to stay in one place most of the time in your RV, I’d definitely recommend checking out WISPs in your area.

Other alternatives such as dial-up, T1, Cable/DSL, etc are not really an option due to the permanent nature of their installation and the fact that they are not designed for mobility.

Using campground Wi-Fi is still one of the best bets for most people. Luckily, there are improvements that can be made to your RV to increase the accessibility, reliability, range, and performance of these wireless networks.

Different ways to increase nearby Wi-Fi signals

rv with antenna

There are two parts to the process of increasing the usability of nearby wireless signals:

  1. Access the nearby signal using a high gain omni or directional antenna located on a high point of your RV such as attached to a window or on the roof
  2. Make this signal available for use inside the comfort of your RV

Utilizing products currently on the market, there are two main ways to accomplish this:

  • Access the external signal directly with your laptop by use of a remote antenna
  • Access the external signal and re-broadcast it inside your RV by means of a booster, repeater, or range extender

Each of these methods involve different twists on the same basic idea – position a high gain omni or directional antenna in a place to optimally receive and transmit data to the campground Wi-Fi network, and then make that signal usable inside your RV.

Differences between Remote Antennas and Boosters/Repeaters/Range Extenders

Remote Antennas

Using a remote antenna is the cheaper option, because it is less complex – one end (the antenna) goes in an elevated area, preferably with line of site to the Wi-Fi source. The other end connects directly to your laptop via USB.

The antenna can be placed on the roof or attached to a window inside of your RV.

The advantage of this solution is simplicity and price. With the remote antenna plugged in, your laptop simply has better access to the wireless signal than it would on it’s own.

The remote antenna includes it’s own wireless adapter in addition to the antenna, but it’s integrated into one device – simply plug in the USB cable into your laptop and you are ready to go. There are no additional devices to configure or power.

Installation is also simpler in some cases – many remote antennas are designed to attach to a window versus permanently drilling a hole in the roof of your RV and mounting an antenna externally.

The disadvantage is that it will not work on tablets or smartphones, it cannot be shared with multiple devices inside the RV, and it’s user will remain tethered to the antenna cable.

Side Note: In some cases you CAN share the internet connection through the laptop with other laptops, tablets, and smartphones in the RV. This depends on several factors, including the type of computer and operating system. Check here for more info.

Best Wi-Fi adapter Remote Antenna for RV

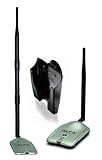
We like the Alfa Network antenna:

2000mW 2W 802.11 G/N High-Gain USB Wireless Long-Rang WiFi Network Adapter with Original Alfa Screw On Swivel 9dBi Rubber Antenna and Suction Cup Window Mount Dock
  • 802.11 b /g and "N", 2000mW of power which is more powerful than ANY other WiFi adapter on the market
  • Includes a 4 inch 5 DdBi Screw-On Swivel Rubber Antenna that can be removed and upgrade up to the include 9dBi antenna
  • Very Secure with wireless data encryption with 64/128-bit WEP, WPA, WPA2, TKIP,and AES and is Compatible with IEEE 802.11n, 802.11b/g/n wireless standards
  • Supports driver for Windows 2000, XP 32/64, Vista 32/64, Windows 7, Linux (2.4.x/2.6.x),and Mac (10.4.x/10.5.x)
  • The Mount designed for easy clinging on Notebook, Netbook and Window.

Boosters/Repeaters/Range Extenders

travel trailer

Boosters, Repeaters, and Range Extenders do exactly what their name implies – they boost/amplify incoming and outgoing signals. An antenna on the roof of your RV is connected to a cable that is ran inside of your RV and connected to a router and an omni-directional antenna located inside. The original, boosted signal is then ready for use inside your RV where your laptop, tablet, or phone will be readily able to connect to it with a stable signal.

Think of it as plugging in your own wireless router between the campground Wi-Fi and your computer. You get a strong signal from the source connection and maintain mobility of Wi-Fi  access inside the RV.

In this scenario, the signal is actually being re-broadcast – you will have your own wireless network name (SSID) and password (to keep other campers off your network). This method provides additional security, since your devices will be located behind an additional router/firewall from the rest of the campground network – but this benefit also comes with the drawback that it is more complex (your traffic will pass through one additional routed “hop” on it’s way to/from the Internet).

The other main benefit of this solution is that you can share the connection with multiple devices such as other laptops, tablets, and smartphones.

Installation is also more complex, however.

If you are looking for a long-term solution, we generally recommend using a booster/repeater/range extender over a remote antenna as it will generally give better results.

Best WiFi repeater for RV

We like the Halo Wi-Fi Extender System:

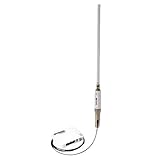
Halo Long Range Marine & RV Wi-Fi Extender System
  • Get marina or RV Wi-Fi service from farther away than with your mobile device alone
  • Wi-Fi connect multiple cell phones, tablets or computers on your boat or RV at the same time
  • Marine-ready stainless steel connector for 14 TPI 1" wide mounts; includes 10M cable
  • Durable marine grade materials withstand harsh conditions at sea or extended outdoor RV use

Best WiFi range extender for RV – runner up

If the Halo isn’t a good fit for you, we also like the Alfa Wi-Fi Camp Pro:

ALFA Network Universal WiFi/Internet Range Extender Kit for Home, Boat, and RVs
  • Receive Internet signal from remote hotspot
  • Ideal for RV, yacht, camping Internet access

Regardless of which option you choose – a range extender versus an antenna, you will definitely notice a large improvement compared to simply using a laptop or tablet to connect directly to campground Wi-Fi – the antenna in those types of devices is simply not designed for the range needed in this situation.

Now get out there and enjoy the great outdoors!

Best Router for a Guest Network

Best Router for a Guest Network

Wouldn’t it be nice if you could give guests access to your Wi-Fi without worrying about them having access to everything on your network such as your files, computers, security cameras, etc.

Previously I had wondered this as well. I always cringed a little bit when I gave out my Wi-Fi password.

Even though I typically only gave it out to people I trusted, such as friends and family, you never really know if the information might be shared later.

Another concern is that you never know what may happen to a device that has your Wi-Fi credentials stored on it. Perhaps you give your password to a friend today, and maybe their tablet gets stolen tomorrow.

The thief could potentially find and access your wireless network from the tablet, or even worse, extract the password from it and share it on the dark web.

Another common scenario would be if your friend sold or gave their tablet to someone else, which could easily lead to your password being compromised.

The point is, once you start to give out your Wi-Fi password, you have lost control of the potential security implications that its distribution might bring about later.

Luckily, there is another way. Many modern routers feature guest network capability, which does exactly what its name implies – it allows you to create a special Wi-Fi network for your guests.

How it works

The guest network will have a different name (SSID) and a different password. Devices that join the guest network will still be able to access the Internet, but they will be restricted from accessing any of your private internal network resources, such as file shares (NAS), printers, security cameras, and more.

This means that you can give out your guest network credentials to friends and family without worrying so much about your security.

Additional Features

Some routers will have additional advanced guest network settings such as the ability to throttle bandwidth, define access schedules, etc.

Bandwidth Throttling

Routers that support guest network bandwidth throttling allow you to define how much bandwidth your guests can use. Sometimes, this limit is a global limit (enforced across the sum of all users) and others this limit is enforced per-user.

For example, my home broadband connection runs at 40Mbps download and 5Mbps upload. In light of this, I have chosen to set my guest user bandwidth policy to 5Mbps download and 1Mbps upload.

This is plenty of bandwidth that a typical guest user would need. It is enough for basic surfing or even streaming a video on YouTube.

It prevents a guest user from (knowingly or unknowingly) abusing access and consuming large amounts of bandwidth by downloading something large, running BitTorrent, etc.

This ensures that my family will still have an enjoyable experience online, since the majority of my bandwidth will be reserved for them.

Access Scheduling

Some routers support the ability to define a schedule for guest network access.

For example, if you only want your guest network to be available on weekdays between 8AM and 5PM, you can configure this.

Any time outside of that schedule, the guest network won’t even appear in the list of available networks and no device will be able to connect to it. How’s that for cool!?

Best Router for a Guest Network – TP-Link Archer A7

TP-Link AC1750 Smart WiFi Router (Archer A7) -Dual Band Gigabit Wireless Internet Router for Home, Works with Alexa, VPN Server, Parental Control, QoS
  • OneMesh Compatible Router- Form a seamless WiFi when work with TP-Link OneMesh WiFi Extenders.Processor : Qualcomm CPU.
  • Router for wireless internet, works with Alexa, compatible with all Wi-Fi devices, 802.11ac and older
  • Dual band router upgrades to 1750 Mbps high speed internet(450mbps for 2.4GHz, 1300Mbps for 5GHz), reducing buffering and ideal for 4K streaming
  • 3 external antennas for long range Wi-Fi. System Requirements-Internet Explorer 11, Firefox 12.0, Chrome 20.0, Safari 4.0, or other JavaScript-enabled browser. Cable or DSL Modem (if needed)
  • Gigabit Router with 4 Gigabit LAN ports, fast access to multiple connected wired devices, Ideal as a gaming router

The TP-Link Archer A7 features all of the Guest Network capabilities mentioned above. Not only does it have the capability to create a basic guest network, but it also allows for bandwidth throttling and access scheduling.

Configuring the Guest Network features can be done easily from the administrative interface:

Archer C7 Guest Network Configuration

As you can see, you can easily configure an access schedule from the Web UI:

Archer C7 Guest Network Configuration

Configuring bandwidth throttling is equally easy:

The team here at Infravio loves the Archer A7 from TP-Link and we recommend it to our readers regularly.

TP-Link AC1750 Smart WiFi Router (Archer A7) -Dual Band Gigabit Wireless Internet Router for Home, Works with Alexa, VPN Server, Parental Control, QoS
  • OneMesh Compatible Router- Form a seamless WiFi when work with TP-Link OneMesh WiFi Extenders.Processor : Qualcomm CPU.
  • Router for wireless internet, works with Alexa, compatible with all Wi-Fi devices, 802.11ac and older
  • Dual band router upgrades to 1750 Mbps high speed internet(450mbps for 2.4GHz, 1300Mbps for 5GHz), reducing buffering and ideal for 4K streaming
  • 3 external antennas for long range Wi-Fi. System Requirements-Internet Explorer 11, Firefox 12.0, Chrome 20.0, Safari 4.0, or other JavaScript-enabled browser. Cable or DSL Modem (if needed)
  • Gigabit Router with 4 Gigabit LAN ports, fast access to multiple connected wired devices, Ideal as a gaming router

The Archer A7 features a host of great features and specifications beyond its guest network capability, which explains its high ratings and widespread popularity.

How to get WiFi at home without a router

Are you looking to have Wi-Fi in your home, but you don’t have a router? This may sound strange, but it is possible using the mobile hotspot feature on your computer. Many of the newer and more popular computer operating systems support this feature (for free).

wifi logo

Not the mobile hotspot that you’re used to

This method of sharing an internet connection is frequently referred to as ‘mobile hotspot’, however this setup differs from most people’s definition of mobile hotspot – which is the process of enabling a feature on their smartphone so that they can tether a computer to the phone for internet access through the phone’s mobile data connection.

Using a smartphone’s hotspot permanently will get expensive very quickly – since you will likely blow through your mobile data allotment in short order. This type of hotspot also requires that the phone has adequate mobile data reception – if your signal is too weak, you won’t be able to even turn on the mobile hotspot functionality on your phone.

The solution we are discussing here uses a computer to act as a router in order to share an internet connection. The internet connection you are sharing could be a Cable or DSL service of your own, or perhaps a neighbor’s Wi-Fi that they are granting you access to.

Why no router?

There are multiple reasons why someone would want to go without a router.

The most common reason is that someone has recently moved and doesn’t yet have a router because they either didn’t buy one yet or because their old router is packed away somewhere and they can’t find it.

Or, perhaps they were leasing their last router from their ISP – in this case, they would have had to return it when they disconnected service at their last house/apartment.

Also, people that are traveling frequently can benefit from hotspot functionality on their laptop. Frequently, while traveling, you will run into internet access services that only allow one device online at a time.

Want to get online with both your laptop and your tablet? In this case, you may have to pay again to get the second device online as well. This type of service is not uncommon and is typically found in airports, cruise ships, and some hotels.

A Mobile hotspot on your computer can alleviate the need for these additional charges and allow you to only pay one access fee for all of your devices.

Pros and Cons to going router-less

Pros

  • Saves money up front – No router to purchase
  • Slightly lower power consumption due to the lack of a router (this only applies in cases where you leave your computer running all the time anyway)
  • It’s an easy fix when you’re in a bind and don’t have a router
  • Excellent for travelers

Cons

  • More complex – Traffic is going to be double NAT’ed in some cases, which can also impact performance
  • Worse performance – Depending on the speed of your computer and the other tasks that are running, your computer may not be able to route packets as quickly as a regular router can
  • Worse coverage – Most computers lack an external wireless antenna, and the ones that do have one are quite small. A router can easily cover a larger area than a computer can
  • Must keep the computer on all the time – That’s right, if you shutdown or reboot your computer, other people in the house that are using your Wi-Fi network will be disconnected
  • Difficult to expand wireless coverage – adding additional access points to your network to increase the range won’t work in some cases because the wired Ethernet adapter on your computer is likely already being used to connect to your Cable/DSL modem
  • Limited to 8 devices (Windows 10) – Windows caps the amount of devices that you can share with at 8 total

It’s only temporary (usually)

There’s no reason why you couldn’t rely on this set up permanently, however, most people will only use it temporarily – such as when they are on travel or if they just moved in to a new place.

A router isn’t THAT expensive and the benefits of using a traditional setup versus a mobile hotspot are many.

Getting Started

Difficulty: Medium
Time Required: 10 Minutes

Prerequisites

  • A computer with an Operating System that supports mobile hotspot functionality (Windows 10, MacOS)
  • The computer must have a wireless adapter (any modern laptop will have a wireless adapter built in, and some desktops have them too)
  • An internet connection to share – either your own Cable/DSL type service, or a nearby Wi-Fi network that you have access to (Windows 10 only – MacOS can’t be connected to WiFi and share via WiFi at the same time like Windows 10 can)

Optional

If you are wishing to share your own Cable/DSL service, your computer will also need to have a wired network adapter for connection to your Cable/DSL modem. If you are sharing a nearby Wi-Fi network, a wired adapter is unnecessary.

Windows or Mac?

See the mobile hotspot procedure for Windows 10 below, or jump ahead to the instructions for MacOS.

Windows 10 Procedure

  • Click on the ‘Start’ Button and click on the ‘Settings’ icon:

start menu settings button

  • Click on ‘Network and Internet’:network and internet settings
  • On the menu on the left, click on ‘Mobile hotspot’

network settings mobile hotspot

You will see a drop down box that says ‘Share my Internet connection from’. If you have multiple connections to the internet, such as a Wi-Fi connection to someone else’s network plus a wired connection to your Cable/DSL modem, you will see them listed here.

  • Choose the connection that you want to share.
  • If desired, you can change the network name and password by clicking the ‘Edit’ button. Your password needs to be at least eight characters long.

Alternatively, you can keep the randomly generated name and password that is already shown on the settings screen.

mobile hotspot settings

  • Lastly, move the slider at the top of the screen that says ‘Share my Internet connection with other devices’ to ‘On’. Your computer is now acting as a router.

You should now see your shared wireless network available on other devices in your home and you should be able to connect to that network using the password shown on the mobile hotspot configuration screen.

You will also see a count of the number of devices that are connected to your shared wireless network:

mobile hotspot devices connected

Remember: If you turn off or reboot your computer, you will cut off anyone else that is using your hotspot.

MacOS Procedure

Note: With MacOS, you can create a mobile hotspot just like in Windows 10, except you can typically only share a wired Ethernet connection. This is due to the fact that Windows 10 allows you to connect to a Wi-Fi network and then share that same network on the same wireless adapter.

MacOS does not support this functionality, so you are generally limited to sharing an internet connection that comes in through the computer’s wired Ethernet port, unless you happen to have two wireless adapters. However, many people want to share their Cable/DSL service through their computer, so this functionality on the Mac is still definitely worth mentioning.

  • Click on the ‘Apple’ menu and then click on ‘System Preferences’:

mac apple menu

  • Locate the ‘Sharing’ option and click on it:

mac system preferences

  • Select ‘Internet Sharing’ on the left side:

mac sharing

  • On the ‘Share your connection from’ drop-down, choose ‘Ethernet’
  • In the ‘To computers using’ box, chose your Wi-Fi adapter (the screenshot doesn’t show a wireless adapter since my Mac doesn’t have one, but your computer should)
  • Click the ‘Wi-Fi Options’ button at the bottom to configure your hotspot. You can chose a name for your network as well as select a channel:

mac wifi settings

We recommend selecting ‘WPA2 Personal’ from the ‘Security’ box and then pick a secure password. If you don’t set a security mode, the network will be created as an open network, which will allow anyone to connect to it. Bad idea.

  • Lastly, check the checkbox next to ‘Internet Sharing’ on the left to enable the hotspot. ‘Internet Sharing’ will show as ‘ON’ and have a green dot next to it once it has successfully been enabled.

You should now be able to see the Wi-Fi network on other devices and connect to it to access the internet.

Remember: If you turn off or reboot your computer, you will cut off anyone else that is using your hotspot.

Best Wireless Router for HughesNet Satellite Internet

What is HughesNet?

satellite with earth reflection

HughesNet Internet service is a type of broadband that uses a satellite network to deliver Internet service to its’ subscribers.

There are many pros and cons to this service, with the main ‘pro’ being that the service is available anywhere in the continental United States and Alaska (as long as you have unobstructed access to the southern sky).

This means that HughesNet (or other satellite-based Internet services) can reach subscribers located in areas where other broadband technologies are unavailable.

Since traditional wireline providers (fiber, cable, or DSL) incur a lot of expenses with the installation and management of a broadband network, ISP’s will generally only build out their network in semi-populated areas. Often times, this leaves people that live in rural areas lacking any options for high speed internet access.

Sometimes, there are other choices available, such as T-1, fixed wireless, cellular/mobile data, and even dial-up. However, these solutions are not always available and can sometimes be quite expensive. This is where Satellite Internet comes in.

Obtainable Speeds

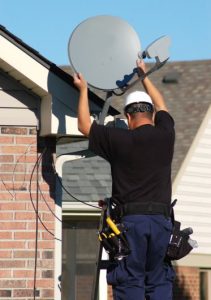
tech installing satellite dishHughesNet’s current service tier, dubbed ‘Gen5’ and served by their epic new “EchoStar XIX Satellite”, boasts speeds up to 25Mbps down and 3Mbps up. While impressive compared to their previous offerings, Gen5 service just barely meets (not exceeds!) the FCC’s definition of Broadband.

When looking for a router to use with HughsNet, the requirements are a bit different compared to someone looking for a router to be used on a higher speed broadband service, such as cable or DSL. Given that HughsNet tops out at 25Mbps, the bandwidth requirements are fairly low.

Even Wireless-N and Wireless-G routers are capable of pushing 25Mbps of traffic sustained. Does this mean that you should dig out that old Wireless-G router from 2005 (WRT54G, anyone)? No!

Selecting a router to use with HughesNet Satellite Internet

New 802.11AC routers provide several benefits beyond increased speed. For HughesNet subscribers, the main benefit of choosing a newer AC router would be range. 802.11AC technologies such as beamforming and MIMO result in better coverage than routers built on previous Wi-Fi standards.

You may only have 25Mbps to work with, but with the right router, you can ensure that you get those speeds in all areas of your home, not just when you’re sitting right next to the router.

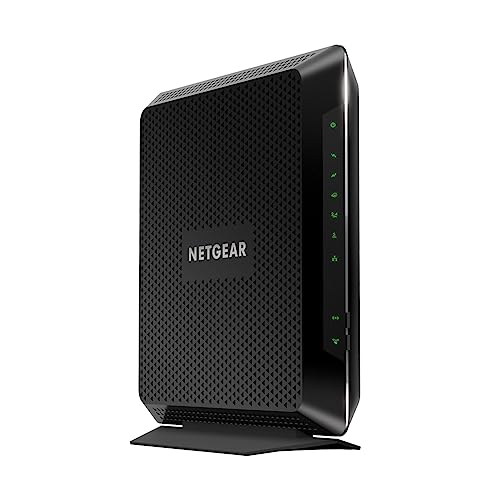
Our recommendation: Netgear R6700

NETGEAR Nighthawk Smart Wi-Fi Router, R6700 - AC1750 Wireless Speed Up to 1750 Mbps | Up to 1500 Sq Ft Coverage & 25 Devices | 4 x 1G Ethernet and 1 x 3.0 USB Ports | Armor Security
  • Recommended for up to 25 devices: Reliably stream videos, play games, surf the internet, and connect smart home devices
  • Wired Ethernet ports: Plug in computers, game consoles, streaming players, and other nearby wired devices with 4 x 1 gigabit Ethernet ports
  • Loaded with advanced technology: Designed with a 1GHz dual core processor, 3 amplified antennas, Beamforming plus, Dynamic QoS, Smart Connect, and more
  • USB connections: Share a storage drive or printer with any connected device or create a personal cloud storage to access from anywhere, using the 1 x 3.0 USB port
  • Safe & secure: Supports WPA2 wireless security protocols. Includes Guest Wi-Fi access, DOS, Firewall, VPN, and more

We like the R6700 because it features the speed and range improvements of the 802.11AC wireless standard at an affordable price point. Given that Hughesnet service tops out at 25Mbps, this router can easily handle those meager bandwidth demands.

This Tri-band router provides excellent speeds, even at long range. It also supports Quality of Service, which if configured, can prioritize certain traffic types over other types. Have a large download running that you don’t want interfering your Netflix streaming? Quality of Service can handle that.

Designed to provide excellent range when used in small to medium sized homes, the R6700 also features parental controls to help you keep your kids safer online.

It is also a stable router – it doesn’t need to be rebooted frequently like lots of other consumer-grade routers. It also features four Gigabit Ethernet LAN ports, to keep your local network running at high speeds.

It includes a USB 3.0 port, which you can use to optionally connect a USB hard drive to the router. This allows you to easily share files with other devices on your network through the router.

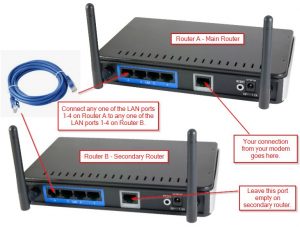
router with lan cable

Any Router Will Work

Speaking Frankly, most any router will work with HughsNet Internet Service, but for the best experience, you should choose one with excellent range and reliability.

We chose to recommend an economical choice in this case, because high throughput is unnecessary, given the relatively low bitrate of the Hughesnet service. The R6700 should fit the bill for most any HughsNet subscriber.

How to access my Netgear router

Accessing your Netgear router’s web interfacenetgear login page

The process for accessing a Netgear router’s configuration screen is actually a little bit easier than most other home router brands.

This is because Netgear uses the routerlogin.com (or routerlogin.net) URL to redirect you to the Netgear router on your own network. That way, you don’t have to remember the IP address of your router. Pretty slick.

To start, open your favorite web browser

  • Clear out anything and everything in the address bar
  • Type in www.routerlogin.com OR www.routerlogin.net (either one will work)
  • Press Enter

You should be directed to the router’s login screen and prompted for a username and password. If not, verify that you spelled www.routerlogin.com or www.routerlogin.net correctly.

If you spelled it correctly, try the other routerlogin varient – assuming you tried www.routerlogin.com the first time – try again, this time using www.routerlogin.net. Likewise, if you tried .net first, try switching to .com.

If it’s still not working, try a different web browser. Also, make sure the computer you are using is connected to your network, either via Wi-Fi or wired in directly.

Find the router’s IP address

If that still doesn’t work, try finding the router’s IP address. See this article for the procedure.

Once you’ve located the router’s IP address, go back to your favorite browser and clear out the address bar again. Now enter the IP address of the router and press enter.

You should finally receive a username and password prompt to login to your router.

Login Credentials

username password login prompt

Now you’ll need your router’s administrator credentials in order to login. For Netgear routers, the username is always admin. It cannot be changed to anything else.

The password is whatever you selected when you first set up the router. It is technically a different password than your Wi-Fi password, but it is possible that you used the same password for both, so give that password a try if you’re unsure.

If you still aren’t sure what the password is, try password or 1234 which are the default passwords for most Netgear devices. Perhaps you never changed the password from the default when you first set the router up.

Reset your router’s configuration to factory defaults

If you are still unsure of what your password is, and the default passwords don’t work either, your only choice is to reset your router to the factory default configuration.

Be advised that this will require you to go through the initial set up again – you will have to set up your Wi-Fi network name (SSID), the Wi-Fi password, the new administrator password, and any other special configurations you previously had in place such as static IP addresses, PPPoE usernames/passwords, port forwarding configurations, etc.

Your internet will likely stop functioning until your router is set up again. If your ISP requires you to use a username and password with their service, make sure you have that information accessible.

If you don’t have it, I recommend contacting them and requesting the information before you reset the router – that way you don’t end up without an internet connection longer than necessary.

computer router login screen

Reasons why you would need to access your router’s management interface

Below are some of the common reasons why a person would need to access the management interface on their router. It is certainly not an exhaustive list:

  • To change their Wi-Fi network name (SSID) or Wi-Fi password
  • To change the IP address of their router
  • To change the IP address of other devices on their network
  • To set up new port forwarding on their router so that they can access their home network via the internet
  • To set up a VPN connection
  • To access/change their PPPoE credentials provided by their ISP
  • To change the hostname of their router
  • To change the Wi-Fi channel their router uses
  • To enable or disable certain bands (2.4Ghz or 5.0Ghz)
  • To check their public IP address
  • To find out how many devices are connected to their network
  • To implement parental access controls
  • To view their bandwidth usage statistics
  • To upgrade their firmware or reboot their router
  • To modify their firewall settings

Remember the steps for next time

I recommend writing down the steps you used to access your router, and the working username and password.

It’s not every day that you need to change settings on your router, but the need does arise every so often. Save yourself a headache later and write the information down now while it is fresh in your head.