Sadly, $150 doesn’t buy you a lot these days, but it will still get you a nice Wi-Fi Router. If you are shopping for a new router in this price range, read on.
The team here at Infravio HQ has reviewed many of the top consumer-grade routers on the market today, and based on current prices, has picked the best router under 150:

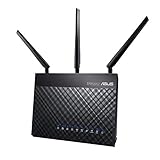
Introducing the ASUS RT-AC68U
- Dual band with the latest 802; 11 AC 3x3 technology for combined speeds of up to 1900 Mbps.AiProtection : AiProtection Pro, AiProtection, Malicious site blocking, Two-Way IPS, Infected Device Prevention and Blocking. WAN : Internet connection Type - PPPoE, PPTP, L2TP, Automatic IP, Static IP. Dual WAN, 3G/4G LTE dongle, Android tethering, Port forwarding, Maximum port forwarding rule : 64, Port triggeringc, Maximum port triggering rule : 32, DMZ, DDNS, NAT Passthrough : PPTP, L2TP, IPSec, RTSP, H.323, SIP Passthrough,PPPoE relay.
- 1 GigaHertz dual core CPU enables smart multitasking by dedicating separate lanes for Wi Fi and USB data; Network standard: IEEE 802; 11a, IEEE 802; 11B, IEEE 802; 11G, IEEE 802; 11N, IEEE 802; 11AC, IPv4, IPv6. Memory: 128 MB Flash; 256 MB RAM
- Effortless router setup with the ASUSWRT web based interface; Dual band connectivity for compatibility and performance
- Monitor and manage your network with ease from your mobile device using the intuitive ASUS router app
- A protection powered by Trend Micro provides multi stage protection from vulnerability detection to protecting sensitive data; Please refer the installation manual and the user manual before use which is highly essential; Dc output: 19 Volt with maximum 1; 75 a current; Guest network: 2; 4 GigaHertz x 3, 5 GigaHertz x 3
Note: Pricing on Amazon fluctuates daily. This router was priced below $150 at the time of this writing and is likely (but not guaranteed) to stay below that mark. We aren’t able to keep up with the price changes, so we recommend clicking the Check Price button, which will send you over to Amazon to see the current price and review the product further.
The RT-AC68U won our top pick for several reasons including reliability, range, speed/throughput, features, and cost.
Good Value is defined as something that is worth the cost. While all routers can’t make this claim, we certainly feel that the RT-AC68U is a good value. Actually we feel that it is an excellent value!
Things we love about the ASUS RT-AC68U
Build Quality
Handling this router, you can tell that it is well made and not a cheap piece of junk. The external antennas are removable, and overall the router is pleasing to the eye.
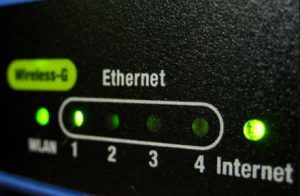
The router features status LED’s on the front, indicating Ethernet 1-4 + WAN port status and activity, USB port status, 2.4GHz and 5GHz radio status, and a power indicator.
Having this indicators clearly identified and located right on the front is handy, especially since some manufacturers put the LED’s on the back, requiring you to move or pick up the router to get a visual check on it.
Speaking of LED’s, there is a button on the back to shut them off in case you are using the router in your bedroom and the bright light generated by the LED’s keeps you awake. Bonus!
I know aesthetics don’t matter to some people, but they matter a whole lot to other people, so I always include it in my reviews.

Good handling of large numbers of devices
The RT-AC68U easily handles a large number of Wi-Fi clients. 50+ concurrent client support has been reported with no noticable slowdown.
If you have a large number of wireless devices in your home, (such as cameras, smart home devices, tablets, phones, and laptops) then you should definitely consider buying a router that can handle a large number of simultaneously connected devices – because not all routers can do so without experiencing performance issues.
- Dual band with the latest 802; 11 AC 3x3 technology for combined speeds of up to 1900 Mbps.AiProtection : AiProtection Pro, AiProtection, Malicious site blocking, Two-Way IPS, Infected Device Prevention and Blocking. WAN : Internet connection Type - PPPoE, PPTP, L2TP, Automatic IP, Static IP. Dual WAN, 3G/4G LTE dongle, Android tethering, Port forwarding, Maximum port forwarding rule : 64, Port triggeringc, Maximum port triggering rule : 32, DMZ, DDNS, NAT Passthrough : PPTP, L2TP, IPSec, RTSP, H.323, SIP Passthrough,PPPoE relay.
- 1 GigaHertz dual core CPU enables smart multitasking by dedicating separate lanes for Wi Fi and USB data; Network standard: IEEE 802; 11a, IEEE 802; 11B, IEEE 802; 11G, IEEE 802; 11N, IEEE 802; 11AC, IPv4, IPv6. Memory: 128 MB Flash; 256 MB RAM
- Effortless router setup with the ASUSWRT web based interface; Dual band connectivity for compatibility and performance
- Monitor and manage your network with ease from your mobile device using the intuitive ASUS router app
- A protection powered by Trend Micro provides multi stage protection from vulnerability detection to protecting sensitive data; Please refer the installation manual and the user manual before use which is highly essential; Dc output: 19 Volt with maximum 1; 75 a current; Guest network: 2; 4 GigaHertz x 3, 5 GigaHertz x 3
Signal Strength
The signal strength on this router is excellent, allowing to to reach devices in the deep corners of medium sized homes.
The 3 external antennas also offer adjust-ability and maximum reliability compared to models with fewer or internal-only antennas.
Advanced ASUS-WRT Firmware
Stability
This router runs and runs without needing a reboot very often. Of course, pretty much any consumer-grade router will need an occasional therapeutic reboot from time to time.
The solution to that problem is scheduled reboots. This router’s ASUS-WRT firmware allows you to schedule reboots to take place automatically at a time of your choosing.
For example, mine is set to reboot daily at 2AM. Since everyone in the house is sleeping, we never notice the reboot.
Know what we do notice though? A router that is always freshly-booted and never has to be manually rebooted!
Consistency between other ASUS Router firmware
The ASUS-WRT interface on this router will look familiar to someone who has used other ASUS networking products in the past.
ASUS does a great job of maintaining consistency between their products, which means some users aren’t starting from scratch with the RT-AC68U since they are already familiar with the firmware interface.
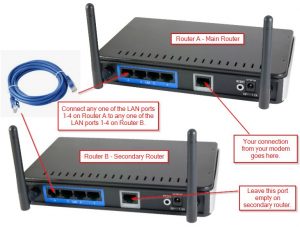
Dual WAN capability
The RT-AC68U also includes the capability to configure one of the LAN ports as a WAN port, giving you two WAN ports.

This is nice, because it allows you to connect the router to two different internet connections, define primary and backup connections, and have the router automatically failover to the backup Internet connection if the primary connection fails.
You can also use one of the USB ports as a second WAN port, allowing you to use a 5G modem as your backup internet service if you wish. Very cool.
Most people don’t have two Internet connections and won’t use this feature, but it’s nice to know it’s there. It’s disabled by default, which allows all 4 LAN ports to be used as such.
Built-in VPN Server
If you are on the road and need access to your home network, ASUS has your back. Simply configure and enable the VPN server on the router, and you will be able to login from anywhere on the Internet to access your network as if you were at home. Just make sure you know what your public IP address is before you leave the house.
Time Machine support
If you have a USB hard drive connected to the router, you can set up the router as a Time Machine target disk. Very cool.
Things we don’t like so much about the ASUS RT-AC68U
AiMesh Feature is flakey
Many ASUS routers come with a proprietary feature called AiMesh.
AiMesh is designed to allow you to connect another ASUS router to your current router via wireless, and then place the second router somewhere else in your home or business with the goal being to bolster your Wi-Fi coverage in spotty areas.
Sounds cool, especially considering the fact that you don’t have to run a Cat5 cable to the new router. This is also marketed as a good way to re-use older routers that you may have just replaced with a new model… also a cool idea.
In practice, the AiMesh feature can be difficult to get working and once it is working, can be somewhat unreliable.
QoS Functionality doesn’t work correctly
Some users have reported issues configuring QoS in order to prioritize bandwidth for certain users or applications. This is an advanced feature and is frequently mis-configured, so we’re not sure if this is an actual bug in the firmware, or user error.
Ethernet port failures
Some users have reported certain Ethernet ports on the router failing, requiring them to either stop using those ports (you could add a basic switch if you need additional ports), or RMA the router with ASUS.
- Dual band with the latest 802; 11 AC 3x3 technology for combined speeds of up to 1900 Mbps.AiProtection : AiProtection Pro, AiProtection, Malicious site blocking, Two-Way IPS, Infected Device Prevention and Blocking. WAN : Internet connection Type - PPPoE, PPTP, L2TP, Automatic IP, Static IP. Dual WAN, 3G/4G LTE dongle, Android tethering, Port forwarding, Maximum port forwarding rule : 64, Port triggeringc, Maximum port triggering rule : 32, DMZ, DDNS, NAT Passthrough : PPTP, L2TP, IPSec, RTSP, H.323, SIP Passthrough,PPPoE relay.
- 1 GigaHertz dual core CPU enables smart multitasking by dedicating separate lanes for Wi Fi and USB data; Network standard: IEEE 802; 11a, IEEE 802; 11B, IEEE 802; 11G, IEEE 802; 11N, IEEE 802; 11AC, IPv4, IPv6. Memory: 128 MB Flash; 256 MB RAM
- Effortless router setup with the ASUSWRT web based interface; Dual band connectivity for compatibility and performance
- Monitor and manage your network with ease from your mobile device using the intuitive ASUS router app
- A protection powered by Trend Micro provides multi stage protection from vulnerability detection to protecting sensitive data; Please refer the installation manual and the user manual before use which is highly essential; Dc output: 19 Volt with maximum 1; 75 a current; Guest network: 2; 4 GigaHertz x 3, 5 GigaHertz x 3
Wrapping Up
Overall, we really like this router. True, it does have some shortcomings, but every router does.
We really like the performance, good signal coverage, and reliability that you get for the price with this router. If you are looking for a new router under $150, definitely check this one out!

Andrew Namder is an experienced Network Engineer with 20+ years of experience in IT. He loves technology in general, but is truly passionate about computer networking and sharing his knowledge with others. He is a Cisco Certified Network Professional (CCNP) and is working towards achieving the coveted CCIE certification. He can be reached at andrew@infravio.com.


 Additional security settings


 This is referred to as latency – it is a measurement of the time it takes data to go from your computer, through the internet to a remote server (Facebook, Netflix, etc), and then all the way back (round trip).
 The internet is made up of thousands of pathways that connect various networks. In some instances, your data has to go through 20-30 routers before it reaches its intended destination (that is considered a lot of routers).


 In short, to improve network range (to include the man cave), bolster coverage (to fix those dead zones upstairs), ensure reliability (you never know when the router is going belly up), and increase size (more ports in the storm).