I’m sure you’ll agree with me when I say this:
Finding a good Wi-Fi router is hard.
I mean, there are so many different brands, models, technologies, and standards to think about, it’s enough to make your head spin.
On top of that, few things are as frustrating as when technology doesn’t work right. You can never really be sure how a router is going to work until you buy one and plug it in at your home.
In this article, we’ll go in depth to review our pick for the best router for Comcast, and explain why we think it’s the best choice for you to spend your hard-earned dough on.
Do you really need a router?
It’s important to recognize that you may not need a router. Comcast may be providing you with a router already.
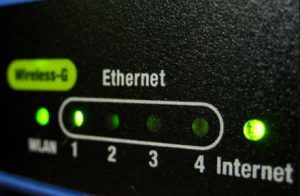
At a bare minimum, you need a cable modem. This is the box that the coaxial cable plugs in to and it will have an RJ-45 network connection as well, which feeds your router. This connection looks like a phone plug, only it is about twice as wide.
Some of the equipment provided by Comcast is just a cable modem, and some of is a combo device, featuring a router and a cable modem in the same device. How to tell?
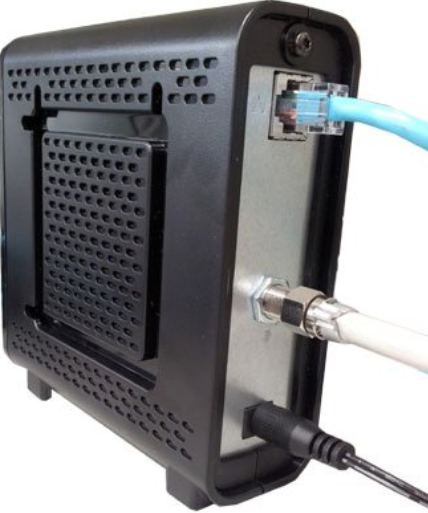

Locate the cable modem/router in your home. If it only has a coaxial connector plus a single network plug, it is likely just a modem. If it has a coaxial connector plus multiple network plugs, USB ports, antennas, or Wi-Fi symbols or branding, it is a combo device.
Comcast-provided equipment
Unfortunately, Comcast’s standard equipment provided at installation seems to vary widely depending on where you live and when you signed up, so it can be difficult to guess what equipment they provided to you. I recommend looking at your monthly bill to see if you are paying a lease fee for equipment. This will likely show a description of what the equipment is such as “modem” or “router with integrated modem”.
A word on equipment lease fees
If you are renting or leasing equipment monthly from Comcast and aren’t planning to move to an area without a cable internet option. you should consider buying your modem and/or router, instead of leasing it.
This can result in significant cost savings over time and has the bonus convenience of not needing to return anything to Comcast when you eventually disconnect service.
If all you have is a cable modem, you will generally be able to only get online on one computer at a time, and you will not have Wi-Fi. Of course, there are ways around this, but most people prefer to just buy a good ole Wi-Fi router so that they can share their Internet connection with all of the devices in their home and also have Wi-Fi.
Even if you determine that Comcast is already providing a router to you, you may still wish to buy a router so you can make your own choice on the best equipment and not be locked into what they think you should have.
Most frequently, a modem/router combo is installed – which spares the customer from having to provide a router if they don’t want to. We generally don’t like modem/router combos, since they are typically a “jack of all trades and master of none”.
If your cable modem also has router functionality, and you are planning to buy your own Wi-Fi router, I strongly suggest configuring your modem for “briged mode”.
This effectively disables the built in router functionality so that your new preferred router can perform those duties. It is best to avoid connecting routers back-to-back after all, to prevent configuration and performance issues associated with double NAT.
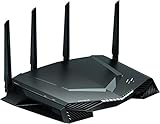
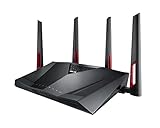
So what is the best router? Our recommendation is the NETGEAR Nighthawk Smart Wi-Fi Router, R6700 - AC1750 Wireless Speed Up to 1750 Mbps | Up to 1500 Sq Ft Coverage & 25 Devices | 4 x 1G Ethernet and 1 x 3.0 USB Ports | Armor Security:
We like that it is a Tri-band router that supports the newest wireless standard, 802.11AC. It has the capability to handle the speeds that you can get from Comcast.
With Comcast, in some areas, you can get Gigabit service (and beyond) via fiber, but the majority of consumers are still on their cable network with service being delivered via the DOCSIS standard on traditional Coax cable. Speeds available to these customers usually top out around 300Mbps currently, which is still smoking fast!
Many routers that are more than a couple of years old will still have a Fast Ethernet WAN port on them, meaning that they top out at 100Mbps. You wouldn’t want to use this type of router with a 300Mbps service for obvious reasons – you simply won’t get anywhere near the speeds you are paying for, since your service will only be running at 1/3 of its potential.
The R6700 has a gigabit WAN port and is built to actually provide a Gigabit worth of actual throughput. Not all routers can make this claim.
The wireless radio on the R6700 can also support full Gigabit – under the right environmental conditions, of course (which applies to all routers, regardless of brand).
What else?
A few other things we really liked about this router: It supports several additional features that you may or may not want to take advantage of, including Quality of Service (QoS). QoS can prevent bandwidth hogs (such as large downloads) from ruining the experience of any real time applications such as VOIP calls or video streaming that is going on at the same time.
After all, no one likes it when their Netflix stops to buffer. This router can prioritize streaming traffic so that the large download doesn’t affect anyone else in the house, for example.
The router also has excellent range for larger homes, has parental controls to help keep your kids safe online, and supports all of the current common WiFi security standards. It is also very reliable and doesn’t need to be rebooted frequently.
Additionally, it sports four wired Gigabit Ethernet ports as well as a USB 3.0 port – which can be connected to an external hardrive and then used as a NAS device to share files over the network.
You can also connect a printer to the USB port, granting the ability to print over the network. This is especially handy if your printer doesn’t already have network capability.
Again, any recent router should work fine with Comcast, but the Netgear R6700 is our choice based on the features, performance, reliability, and price.

- Recommended for up to 25 devices: Reliably stream videos, play games, surf the internet, and connect smart home devices
- Wired Ethernet ports: Plug in computers, game consoles, streaming players, and other nearby wired devices with 4 x 1 gigabit Ethernet ports
- Loaded with advanced technology: Designed with a 1GHz dual core processor, 3 amplified antennas, Beamforming plus, Dynamic QoS, Smart Connect, and more
- USB connections: Share a storage drive or printer with any connected device or create a personal cloud storage to access from anywhere, using the 1 x 3.0 USB port
- Safe & secure: Supports WPA2 wireless security protocols. Includes Guest Wi-Fi access, DOS, Firewall, VPN, and more

Andrew Namder is an experienced Network Engineer with 20+ years of experience in IT. He loves technology in general, but is truly passionate about computer networking and sharing his knowledge with others. He is a Cisco Certified Network Professional (CCNP) and is working towards achieving the coveted CCIE certification. He can be reached at andrew@infravio.com.


 The need for speed